
- Starter Questions: Help new users get immediate value by showing them the types of questions they can ask, removing the initial challenge of what to ask first.
- Prompt Gallery: Allow users to leverage expert-level queries without needing to craft them from scratch, enabling more powerful and sophisticated data exploration.
- Autocomplete: Guide users to better-phrased questions as they type, helping them formulate successful queries faster and more efficiently.
Starter Questions
Starter Questions are enabled by default to help users get started with a new domain. These questions come pre-loaded and are designed to work “out of the box.” Your primary task is to refine them better to match your organization’s specific needs and terminology. Then, click on View generated answer to see the SQL tied to your question and the response. To find them, go to Domains > Select a domain > Advanced > Starter Questions.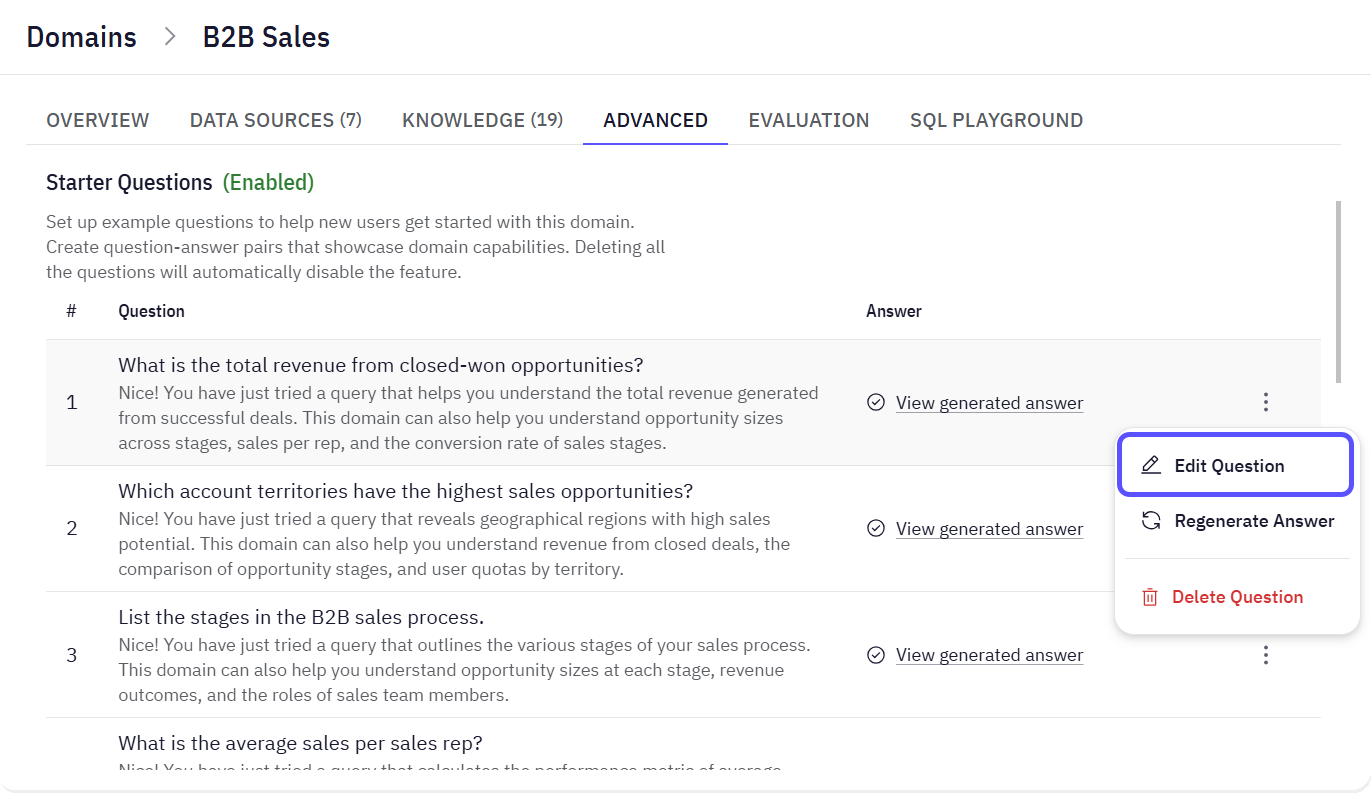
- Currently, you can only edit or delete the default Starter Questions. You cannot add new ones from scratch.
- If you delete all the Starter Questions, the feature will be disabled, and you will not be able to create new ones. It is highly recommended to edit the existing questions rather than deleting them.
- To learn how to edit Starter Questions, read Add Sample Q&A for Starters.
Prompt Gallery
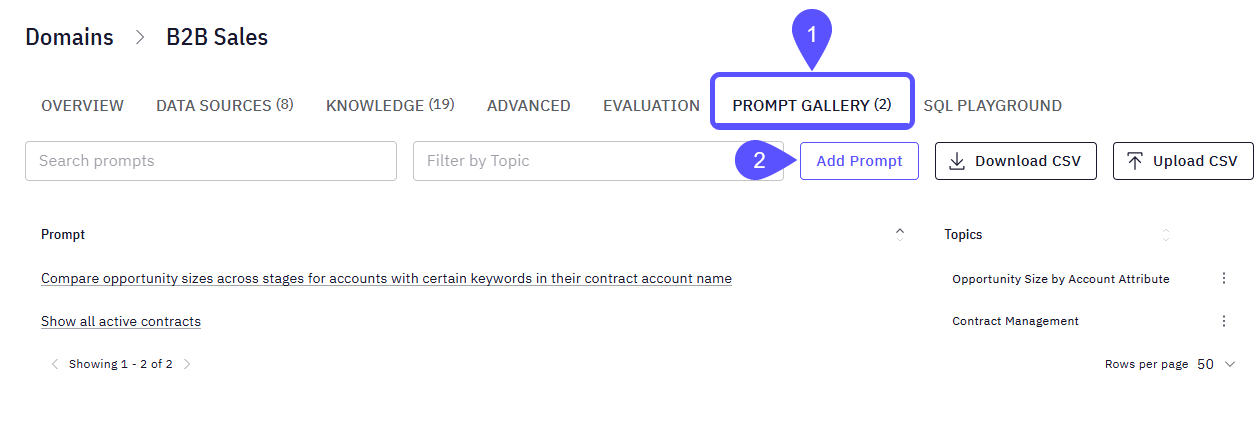
The Prompt Gallery is a curated collection of reusable prompts. This is the most powerful tool for guiding your Explorers, as it serves two functions:- Helps you create a browsable gallery of expert-level queries.
- Uses the generated prompts to populate the Autocomplete suggestions in the chat.
- Navigate to the Prompt Gallery tab within your selected domain.
- Click the Add Prompt button.
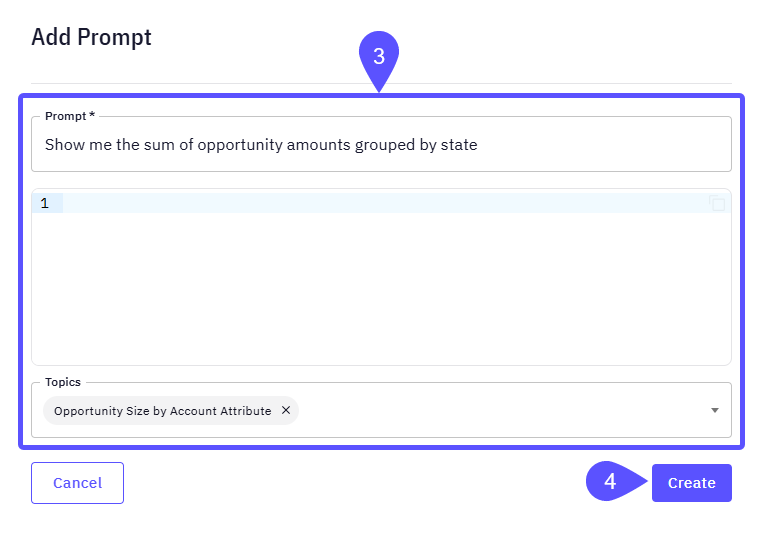
- In the dialog box that appears, you will need to define:
- The Prompt: Write the full query you want to save. This should be a well-formed question or command that provides significant value.
- Topics: Assign one or more topics (e.g., “Contract Management,” “Opportunity Analysis”). This helps organize the gallery for easier browsing.
- Click Create. Your new prompt is now part of the gallery and will be used for autocomplete suggestions.
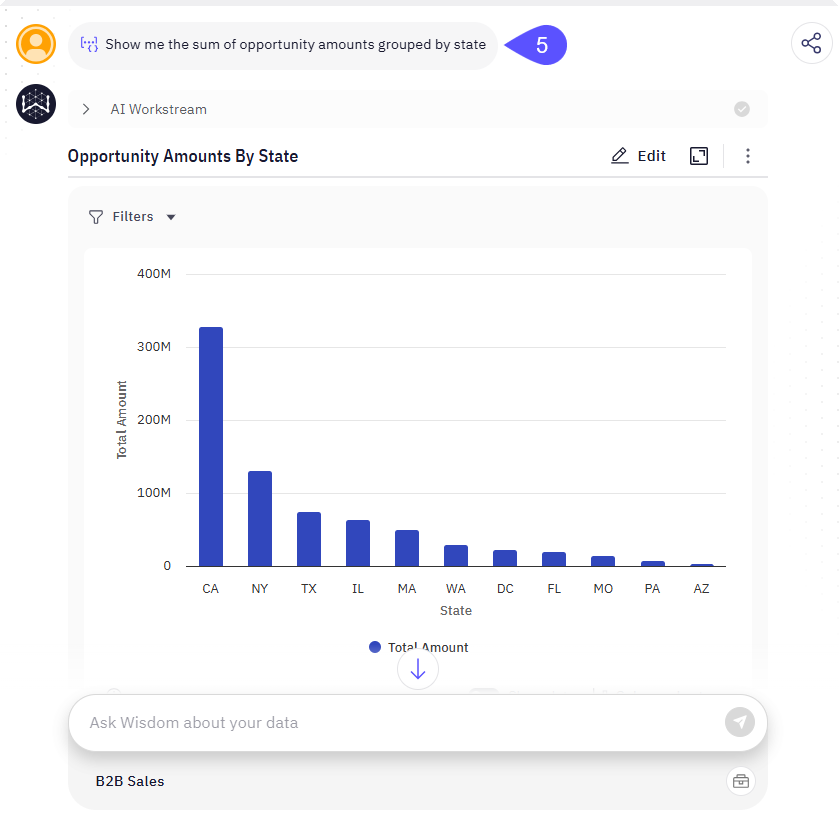
- Click on the prompt to open the chat and see the system’s response to it.
Autocomplete
The Autocomplete feature is directly tied to the prompts you create in the gallery. It is a domain-specific function, which means that a suggestion will only be retrieved from the Prompt Gallery of such a domain. To manage your Autocomplete suggestions, you must manage your Prompt Gallery. Adding, editing, or deleting prompts will directly affect the suggestions that appear for your Explorers. This setup ensures that users are always guided by a curated and admin-approved set of queries. When a user starts typing a query in the main chat window, the system will search the Prompt Gallery for relevant prompts and display them as clickable autocomplete suggestions.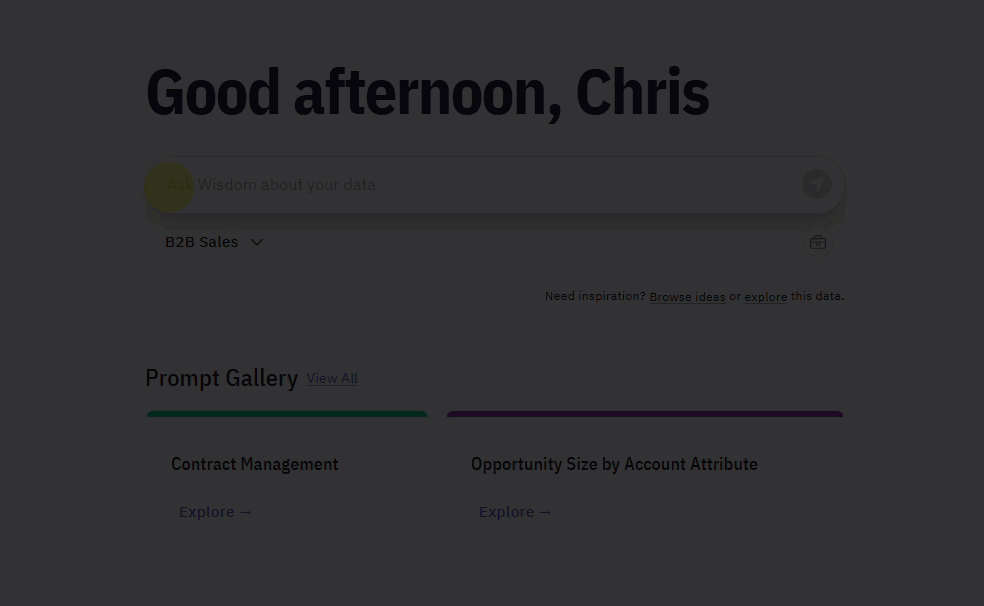
Next Steps
Advanced Data Modeling
Define relationships and context in your data to enable more powerful analysis.
Provide Feedback to the System
Learn how to rate answers and provide corrections to improve the system’s accuracy.
Configure Domains
Manage and customize your data domains to refine context and improve query results.